This post explains how to do SPI loopback testing in RaspberryPi.
This is the pinout of RaspbeyyPi GPIO header.
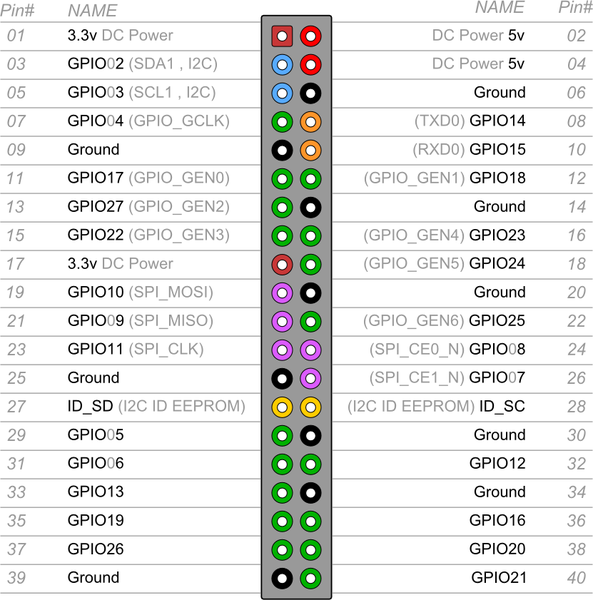
Next short the MOSI and MISO pins (GPIO10 and GPIO09)
Now download SPI test code from below link
https://raw.githubusercontent.com/raspberrypi/linux/rpi-3.10.y/Documentation/spi/spidev_test.c
Compile it
gcc -o spidev_test spidev_test.c
Run the code using spi dev
./spidev_test -D /dev/spidev0.0

If you are getting the hex characters as shown in screenshot, the SPI loopback is working.

…just wondering… what am I to make out of this result?
No hex characters = SPI not working (anymore)??
Is there anything I could have done wrong with the below to get to this result?
Many thanks,
Bastian
pi@raspi01:~ $ gcc -o spidev_test spidev_test.c
pi@raspi01:~ $ ./spidev_test -D /dev/spidev0.0
spi mode: 0x0
bits per word: 8
max speed: 500000 Hz (500 KHz)
pi@raspi01:~ $